
How to Complete Identity Verification (KYC)
After creating your Belyfted account and verifying your email address, you must complete Identity Verification (KYC) before accessing all platform features.
Belyfted uses Didit to securely verify your identity and comply with financial regulations.
This guide explains what happens after you verify your email and how to complete the KYC process.
Before You Start
Make sure you have:
- Completed account registration
- Verified your email address
- A valid government-issued identification document
- A device with a working camera
- A stable internet connection
Accepted identification documents may include:
- Passport
- National ID Card
- Driver's License
Document availability may vary depending on your country.
Step 1: Verify Your Email Address
After registering your account, Belyfted sends a verification email to your registered email address.
- Open the verification email.
- Click the Verify Email Address button or verification link.
Once verified, you will be redirected to the Belyfted login page.
Step 2: Sign In to Your Account
- Enter your email address or username.
- Enter your password.
- Click Login.
After logging in, you may see a notification indicating that identity verification is required before you can fully use your account.
Step 3: Start Identity Verification
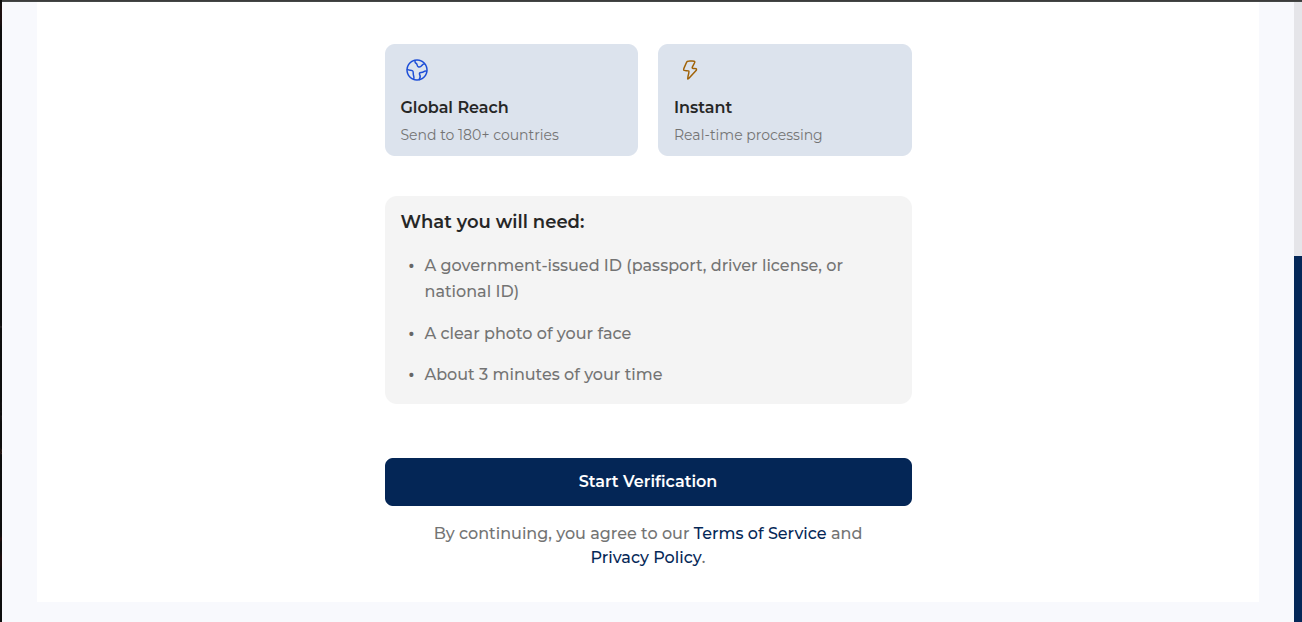
- Locate the identity verification prompt.
- Click Start Verification.
You will be securely redirected to Didit's verification system.
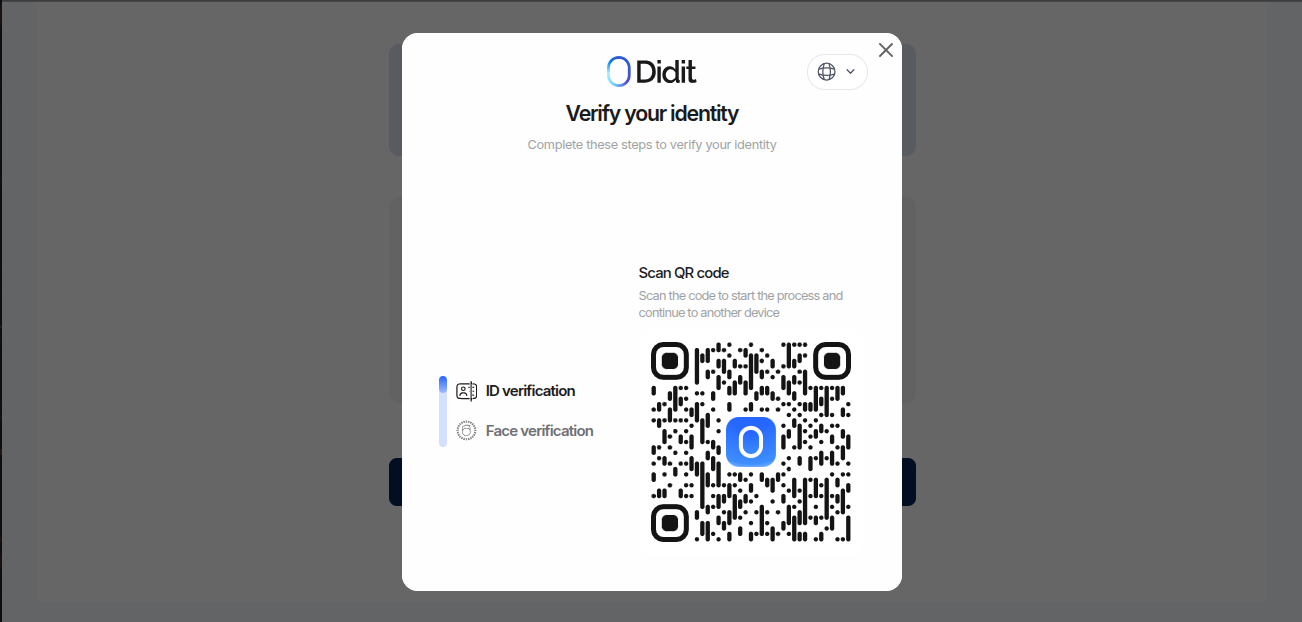
Step 4: Select Your Country
Didit may ask you to confirm your country or region.
- Select your country.
- Review any country-specific verification requirements.
- Continue to the next step.
Step 5: Choose an Identification Document
Select the type of identification document you want to use.
Available options may include:
- Passport
- National Identity Card
- Driver's License
Choose the document you have available and continue.
Step 6: Capture Your Document
Using your device camera:
- Position the document within the camera frame.
- Ensure all text is visible and readable.
- Capture the front side of the document.
- Capture the back side if requested.
For best results:
- Use good lighting.
- Avoid glare or reflections.
- Ensure document edges are visible.
- Use the original physical document.
Step 7: Complete Face Verification
Didit will perform a facial verification check to confirm that you are the owner of the submitted identification document.
You may be asked to:
- Take a selfie
- Move your head slightly
- Follow on-screen instructions
- Allow camera access
The verification process typically takes only a few moments.
Step 8: Submit Verification
After completing the document and facial verification steps:
- Review your information.
- Submit your verification request.
Didit will securely process your verification data.
Step 9: Wait for Verification Results
Once submitted, your verification enters review.
Possible outcomes include:
Verification Approved
Your identity has been successfully verified.
You can continue using your Belyfted account and access supported services.
Additional Information Required
You may be asked to:
- Upload a clearer document image
- Retake a selfie
- Submit an alternative identification document
Follow the instructions provided and resubmit your verification.
Verification Rejected
Verification may be rejected if:
- Document images are unclear
- The document is expired
- The information does not match
- Facial verification cannot be completed
You may be given the option to retry the verification process.
Common Issues
I Didn't Receive the Verification Email
Check:
- Spam folder
- Junk folder
- Promotions folder
If the email cannot be found, request a new verification email from the login page or contact support.
My Verification Link Has Expired
Verification links may expire for security reasons.
Request a new verification email and use the latest link provided.
Didit Cannot Read My Document
Ensure:
- The document is not blurry
- All corners are visible
- Lighting is sufficient
- There is no glare covering important information
Retake the image and try again.
Face Verification Failed
Try the following:
- Move to a well-lit area
- Remove sunglasses or hats
- Clean your camera lens
- Follow all on-screen instructions carefully
Then restart the verification process.
My Verification Is Still Pending
Verification times can vary depending on review requirements.
If your verification remains pending longer than expected, contact Belyfted Support for assistance.
What Happens After Verification?
Once your identity verification is approved:
- Your account status is updated.
- Compliance requirements are satisfied.
- Additional Belyfted services become available.
- You can continue setting up and using your account.
Need More Help?
If you experience issues during verification, contact Belyfted Support and provide:
- Your registered email address
- Your account username
- A description of the issue
- Screenshots of any error messages, if available